
This blog post contains affiliate links. If you purchase an item using our link, we may receive a small commission at no additional cost to you.
Last year we installed a metal arched trellis using some left over rabbit fence and it ended up being an HUGE failure! At first it worked out great… but then my bean plants grew too large and the rabbit fencing collapsed.
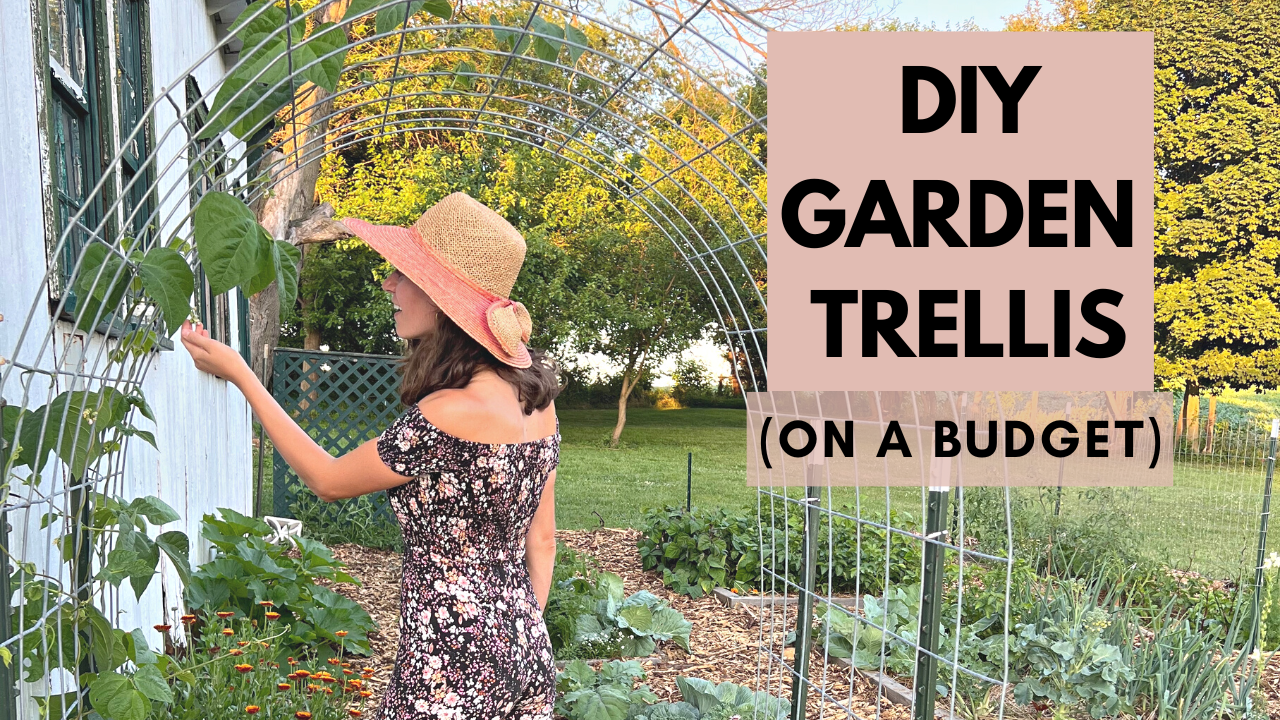
This year we upgraded to a cattle panel trellis.
This was a super easy switch and a relatively inexpensive one too! The most expensive item was the cattle panel but keep reading for a tip to get a discount 😉
Before we dive into “How to Build an Arched Trellis,” let’s talk about the benefits of growing plants vertically.
Benefits of Including Arched Trellises in Your Garden:
1. Beauty of a Garden Trellis
Adding a cattle panel trellis to your garden space creates so much beauty in your garden space! The tunnel-like appearance makes the space feel magical and adds an artistic element to your garden. If you spend a lot of time in your garden, it’s important to make the space beautiful and somewhere you want to spend time.
2. Increase Available Gardening Space
Growing plants such as beans, squash, cucumbers, and peas vertically and over a trellis helps free up garden space. If you create a trellis that goes over your garden bed, you might lose out on much needed space for other plants.
3. Access to Plants and Disease Prevention
Harvesting beans and cucumbers can be a pain when grown close to the ground. Growing them vertically and over a walkway makes the harvesting process much easier and more enjoyable. I also love that it provides more airflow for the plants which helps prevent disease and excess moisture.
How to Build an Arched Trellis
Always wear gloves and safety glasses when working on homesteading projects!
Materials Needed:
-
QTY (4) T-Posts
-
T-Post Driver (You can also use a sledge hammer)
-
Zip-Ties (You can use stainless steel or plastic but the stainless steel will hold up better over time.)
-
Tool for cutting zip-ties (not required but if desired)
Approximate Project Duration: 15 Minutes
Steps for Installing a Cattle Panel Trellis:
-
Select the location of your arched garden trellis. I located mine over a walkway that is ~3.5-4 feet wide.
-
Drive the 4 t-posts into the ground (2 on each side) using either a t-post driver or sledge hammer. Spacing isn’t super critical but we spaced ours ~3.5 feet apart when using a 50inch wide cattle panel. Make sure to leave enough space in front of the posts to plant your seeds or seedlings.
-
Recruit some help for placing the cattle panel. Cattle panels are rigid and can be hard to bend with one person. Place one end in front of 2 of the t-posts. Carefully bend the other end of the cattle panel in front of the 2 remaining t-posts.
-
Secure the cattle panel to the t-posts using zip ties. We used stainless steel zip-ties but plastic would work fine too!
-
Cut off the end of the zip-ties if desired. Be careful if cutting stainless steel zip-ties because the ends will be extremely sharp! We suggest bending the ends rather than cutting them.
Project Cost for a DIY Cattle Panel Arched Trellis:
The cost of your trellis will vary depending what materials you already have on hand. For us, we already had 4 t-posts, a t-Post driver, zip-ties, and a tool for cutting the zip-ties. Our project only ended up costing ~$14 because we only had to buy the cattle panel.
But Elaina… The cost of a cattle panel is $32 in the link you provided??
Yes, you’re correct! Remember how I said I would give you a money saving tip?
Money Saving Tip:
Look for a damaged cattle panel and ask for a discount! This is exactly what we did and we ended up getting 50% off!
Fun Plants to Grow on a Trellis:
Happy Gardening!
- Elaina